Wednesday, December 12, 2012

Please Return Your Seat to Its Full, Upright Position

It's been a productive few days. We put the main drive pulley on and lined it up with the motor; we moved the breast and aligned it with the card; and we moved the doffer and aligned it with the card. 


Dad fidgeting with the main pulley to get it just right

The motor is three phase electric and will need to be bolted to the floor


The breast in place (on the left of the card)


Here we have the doffer in place on the right of the card


A better picture of the doffer


Dad left about noon to have a nap so I thought I would finish plowing the driveway. I spent nearly five hours on the tractor on Monday but wanted to plow a wider path. Fortunately, I fed the sheep and the animals before attempting to widen the driveway.


Please return your seat to its full, upright position


Please return your seat to its full, upright positon

I'll do that later, after I've had a lot of wine and slept it off. For now, it can sit there. 

I felt the tractor sliding into the ditch, then starting to tip, I jumped off and was very lucky it only tipped on its side. I'm fine--hopefully the tractor will be okay when its upright again. 

I'm off to a hot bath and a bit of wine.


Wednesday, December 5, 2012

The Card is Coming Together!

Numerous and many in-depth google and bing searches have convinced me that the woodruff keys I need are $30 to $35 each. Outrageous for a half moon shaped hunk of iron approximately 5/8" x 3.5" long.  So, being innovative (at least my Dad is), we decided to purchase some 5/8" keystock and make two keys. The keystock was a little over $12 and we could make THREE--count 'em--THREE keys from it. Only made two, for now.

Today was a very productive day. That isn't to say we've been slacking off since the last post--in fact, we continued to clean, repair and replace many parts on the carder. However, at the end of the day, today, I could see some real progress. The carder is finally coming together--literally.

Dad grinding down a key to make it fit perfectly


While Dad was grinding and fitting the keys, I adjusted the fancy. This is done by chalking an area under the fancy on the main cylinder, placing the fancy back on, turning it swiftly, then removing it again to measure the width of the area where the fancy brushed out the chalk.

You can just see the line where the fancy brushed the carder

The fancy is readily adjustable depending on the fineness of the wool being processed. I decided to set the width at 1" for medium wools. It started out over 2" wide and needed several fine adjustments to get it down to 1". 

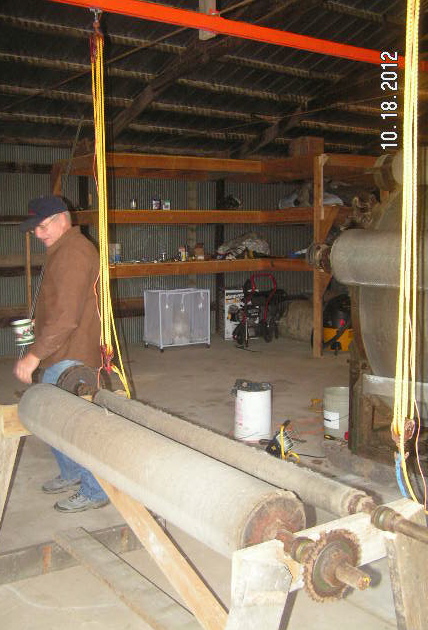
While the fancy was off, we decided to check the distances between the main cylinder, the workers and the strippers. There should be about 15/1000" distance between each item. One stripper was way too close (we could hear the teeth on the cards interfering). We reset that stripper. The other workers and strippers were "close enough" for the time being. In actuality, the distance is supposed to be checked with the belt on. We were just doing a preliminary check.

Dad checking the distance between a worker and the main cylinder using feeler gauges


By mid-day, I was very chilled and Dad was ready for a nap. We agreed to meet back in the shed in a few hours.

Later in the day, we started to move the breast and align it with the card. 

The breast, on skids, is a fair distance from the card


Look familiar? Yep, back to jacking up a bit on each side to remove the skid without twisting the breast


The breast is on four steel rollers. Dad welded 1/2" square tubing onto 3/8" x 4" steel plates to make a track for the breast to roll on. The square tubing is a guide so that the breast will not fall off the plate. 

This shows the track that the breast will roll on


We set the rollers on the track and then moved the breast closer to the card. But let me back up a moment. When the breast was still on skids, we adjusted the steel pipes under the skids in order to align the breast with the card. Slight adjustments to the angle of the pipe and we were able to get a fair alignment.

This is where we left the breast for now. The bolt in the middle needs to line up perfectly with the card. We are about 1/2" out of alignment at the moment--plan to fix that using dueling jacks (one on each side of the breast to move is just a slight amount at a time). 

But the day was not over. The main leather drive belt was in the house warming up. When it was cold, it was about 2 3/4" too short. Warming it up gave us just enough stretch to get it on the card. The belt drives the main cylinder, the strippers, and the fancy. 

Success! The belt is in place. BTW, the fancy is the roller on the far right--it has much longer teeth than the other parts of the card and is the only piece that meshes with the card. 


Here's the other side of the card with another leather belt placed successfully

What a great day. It feels like the card is finally coming together.

Sunday, November 11, 2012

Drinking Beer and Cooking Chili

I could lie and say we'd been hard at work all day in the cold but we weren't. Instead, I spent my Sunday morning, as many Sunday mornings, watching and listening to the political pundits analyze the week. It goes in one ear and out the other but makes for quality knitting time.

I spent a bit of time feeding the sheep and talking to them, giving some cookies and scratching ears.

Later, Dad showed up about 4 to "sit around the fire and drink beer."  It was awful windy up here on the hill so we started a fire in the kerosene heater, put a pot of chili on top and drank some beer. Two bowls of chili (each) later and a few beers and we were done for the night. Tomorrow is another day to get some work done.


Drinking beer and cooking chili


It wasn't a wasted week. We took the vacuum off and shined it up a bit. That's the two pipes running across the upper part of the carder. The mechanism between can be hooked to a vacuum source and helps to clean the main cylinder. It rides side to side on the two pipes. 


We set the main card down on the concrete by removing the skids under it. We did this a little bit on each side at a time so as not to twist the card.

No skids!

I'm a little afraid to clean much more. It seems like when the grease and dust are removed, we find cracks in the hubs of pulleys or worn parts or missing woodruff keys--more and more that needs to be fixed, welded, shimmed, or replaced. This week it was a 16" pulley that had a crack in the hub and was worn so that it was too big for the shaft. Had it welded and then a machinist put a shim in the hub so it will fit the shaft perfectly. Now we need to smooth out the shaft a bit. Also need to replace a 3 7/16 bushing! Not a cheap item but fairly easy to find on ebay.

Still planning to have it up and running by spring. 8-)

Thursday, October 18, 2012

More Cleaning

Its been awhile since I posted but we've been busy working on the card. 

Last week, I spent a day cleaning the grease off of the front of the card and discovered it is painted green! Also, found a date, "1929," stamped on the front. So, the carder was made in 1929, not 1918, as advertised. It is much younger than expected!

I tried 409 to cut the grease but it did nothing. Then I tried sudsy ammonia, that, too, was ineffective. Finally, I used gasoline. That worked well but after spending 6 hours inhaling gas fumes, I had a headache that lasted 24 hours. Ugh! The carder looks much better--well, the part I cleaned, that is. Still a lot more to clean with gas. 


Just enough cleaned of her to show the date, "1929" and the name "Davis and Furber Machine, Co."


Six hours of cleaning with gasoline yielded a green machine! 


Meanwhile, Dad has been working on a track system that is set up above the carder. Its to lift the rollers up and off the card and set them on a stand for easy cleaning.

Today, we tried it out and it is ingenious! Worked perfectly. We lifted four of the rollers off; I managed to clean two and a half of them. Need to get up early tomorrow morning to finish the remaining 1.5 before Dad shows up!

Painted Allis Chalmers Persian Orange, the track system worked great!

Two rollers ready to be cleaned

Dad has also been cleaning and checking the sprockets and gears. So far, I've ordered six weld-on sprockets, 50 feet of roller chain and various bushings, collars, nuts, bolts, etc., etc.

I was very naive in thinking that we would bring the card home, do some wiring, hose it off a bit, plug it in and be in business! However, my initial goal of having it up, running, and in business by May, 2013 is still in place. But it may take a month or two before the initial start up and practicing with the wool I bought begins.

Oh, well, it gives me something to look forward to on the days I'm not subbing.

Wednesday, October 3, 2012

Cleaning the Card

Today was very exciting. I spent a few (felt like several) hours cleaning the card with a slicker brush and a linoleum knife! Woo-hoo!

I didn't finish--there is at least a month of work to get all the rollers and cylinders clean. Years of dust and dirt and accumulated wool are caked into the teeth of the card. Its dirty and dusty work. 


Saturday, September 29, 2012

Moving the Card to its Final Resting Spot

Wednesday morning, we moved the card from outside the shed to its final place inside the shed. After moving, we played around with various implements trying to find the perfect one to clean the wool off of the machinery. A grill brush worked great on the breast and a slicker brush worked best on the card. 

Here's the card outside the shed. Weighing in at an estimated 4-5000 lbs, this was going to be very difficult to move by hand


We tied a pulley to a post in the shed and used my Allis C to pull the card into the shed a few inches at a time


Here's the card moving back into the shed. We then had to move it forward to put it in its final spot


In position! We pulled it forward with the tractor as far as we could. Then we moved it into its final position with Dad pulling and me using a bar under the back of the skid to move it into position. By positioning the metal pipe at different angles, we were able to hit the mark on the floor.


Dad using a slicker brush to clean one of the rollers. This is going to be a month long process!


Wednesday, September 26, 2012

Home Safe and Sound!

Yesterday, we moved the last piece of the card! Hurrah!

I started the morning with a tour of the barn to look at all the stuff we've moved so far:

Picker

Batt Roller

A lot of motors, the blower, the rover, etc.

Shields and chains and belts and more motors


 In the afternoon, we moved the card:


Dad and Harlan positioning rollers under the card


Repositioning rollers


Rolling onto the trailer

Success!

Ready to drive home


While I ran the winch, I also made a video of the card moving onto the trailer:


Unloading the card

Ms. Bee Haven chooses not to help unload

Tuesday, September 25, 2012

Getting the Card Ready to Move

Yesterday, we moved the mid section of the card into position for winching onto the trailer. It was not easy. All three of us had to work in sync to get the steel pipe under the skids, align them to turn the card, and push the card inch by inch into position. Dad used the red bar in the photo by wedging it under a skid and pulling up to move the card just a few inches while Harlan and I pushed. He also had to wedge the bar under the skids and stand on it in order to lift the card just enough so that we could adjust the steel pipes. 

Dad and Harlan with the card in position to winch onto the trailer


In other news, Mom and I moved two horses in the morning. We moved Paco over to the trainer and brought Kisses home from the trainer. Unfortunately, no net change in the number of horses on the farm--still two.

Thursday, September 20, 2012

Moving the Breast and Jacking up the Center

Wednesday we spent a few hours working to move the breast and put skids under the center part of the card. 

Dad and Harlan putting rollers under the breast as I operate the winch


We had about two inches of tolerance to load the breast on the trailer. Here, Dad is using a chainsaw to cut off the excess edge of the board


Ahhh, success! Loaded and ready to roll


Dad and Harlan working in tandem to jack up the center piece of the card. We jacked one side up about 4 inches, moved to the other side and jacked it up to 6.5 inches, then returned to the first side and jacked that up to 6.5 inches. The 6x6 timbers fit nicely under the card and we pulled out the cribbing


This is the last piece yet to be moved to its new home. I think it looks like a woman in rollers. See the skids underneath?


Here's the breast unloaded and ready to roll into the shed

Another successful move. Still trying to decide on the final layout of the card in the shed. Should it go crosswise the short way or the long way? The shed is 30x60 but the floor was poured in two separate pieces so there is a split midway making each section 30x30. The card has to be on either side of the crack, it cannot cross it in case the floor heaves or shifts.

Wednesday, September 19, 2012

Grandpa's Allis "C" Finds a New Home

About a month ago, my Dad asked me if I wanted a lawn tractor. I thought he meant a lawnmower without the deck. I said I would love to have a little lawn mower to pull stuff around. Well, we were talking at cross purposes. Finally he said, "Let's go look at it." Well, it wasn't a lawnmower, it was an Allis Chalmers C Tractor. My grandfather bought it new and drove it home from Day, MN.

Needless to say, I said, "Yes."

Today, I brought the tractor home. Dad got it running, repaired the tires, cleaned it up, stitched a new seat cover for it and helped me load it.

Here it is:

Granpa's Allis Chalmers C 

Tuesday, September 18, 2012

Busy Day Washing and Moving

A busy day today. Dad came over midmorning with a 50 gallon drum of water for powerwashing the feed box. Despite the foaming capacity of the soap, it did not do a very thorough job of cutting through 80 years of grease, grime, lanolin and wool.  We tried picking the wool out from between bearings with wire and pliers with little success.

Later, we headed over to Harlan's to put the breast on skids and to load the "butt" onto the trailer. "Butt" is probably not the technical word for it but since one end of the carder is the breast, it makes sense to me that the other end would be the "butt."

Both jobs went amazingly well. Harlan continues to be a big help. 

At home we unloaded the butt, pushed it into the shed for the night and called it a day. At least, Dad called it a day. I'm still waiting for the people to come to fix the water!


Dad power washing the feed box


Frankie taking a break from all the hard work cats are required to do every day of their busy lives


Dad trying to pick out wool and gunk from between the bearings and bushings

Dad and Harlan cutting a freshly milled white oak 4x5 into a skid for the breast


Success! The "butt" is on the trailer


Here we are at home unloading the "butt"

The butt sitting on the concrete pad halfway into the shed for the night

It may seem from the photos that I don't do much work. But honest, I've got my hands and feet in helping out, putting in lag screws, stacking cribbing, working the winch, giving advice and taking pictures.